Essential Tools and Monthly Inspection Protocol
Your garage door is likely the largest and most frequently used moving part of your home, opening and closing thousands of times each year. In Austin, TX, busy homeowners often overlook its upkeep, leading to unexpected breakdowns, safety hazards, and expensive repairs. Neglecting this vital system can even pose injury risks, as seen in the tens of thousands of incidents reported annually. This guide provides practical DIY garage door maintenance tips between professional visits, empowering you to keep your door running smoothly and safely. We will show you how simple, regular care can extend its lifespan, prevent common issues, and ensure peace of mind for your family.
Throughout this guide, we will walk you through essential tools, crucial safety tests like auto-reverse and photo-eye checks, and correct lubrication techniques. We will also cover seasonal maintenance needs and help you understand which tasks are safe for you to handle, and when it’s truly best to call for expert assistance. Mastering these simple steps can significantly reduce wear and tear and help avoid major malfunctions. For a deeper dive into expert garage door maintenance best practices, we invite you to review our comprehensive checklist. Our aim is to equip you with the knowledge to maintain your garage door effectively, ensuring its longevity and reliable operation.
Effective DIY garage door maintenance begins with having the right tools and establishing a consistent inspection routine. While you won’t need a professional’s full arsenal, a few basic items will make your maintenance tasks safer and more efficient. We recommend gathering a standard set of hand tools, including screwdrivers, pliers, and a socket set for tightening various bolts and nuts. Safety glasses are non-negotiable for eye protection, especially when working near springs or moving parts. Keep a supply of clean rags handy for cleaning and applying lubricants, and a sturdy stepladder will be essential for safely reaching higher components like the opener and top rollers. A level can also be useful for checking track alignment.
Once equipped, we advocate for a monthly “look and listen” inspection protocol. This involves visually scanning the entire garage door system and actively listening for any unusual noises during operation. This proactive approach allows you to catch minor issues before they escalate into major, costly problems.
Look-and-Listen Visual Check
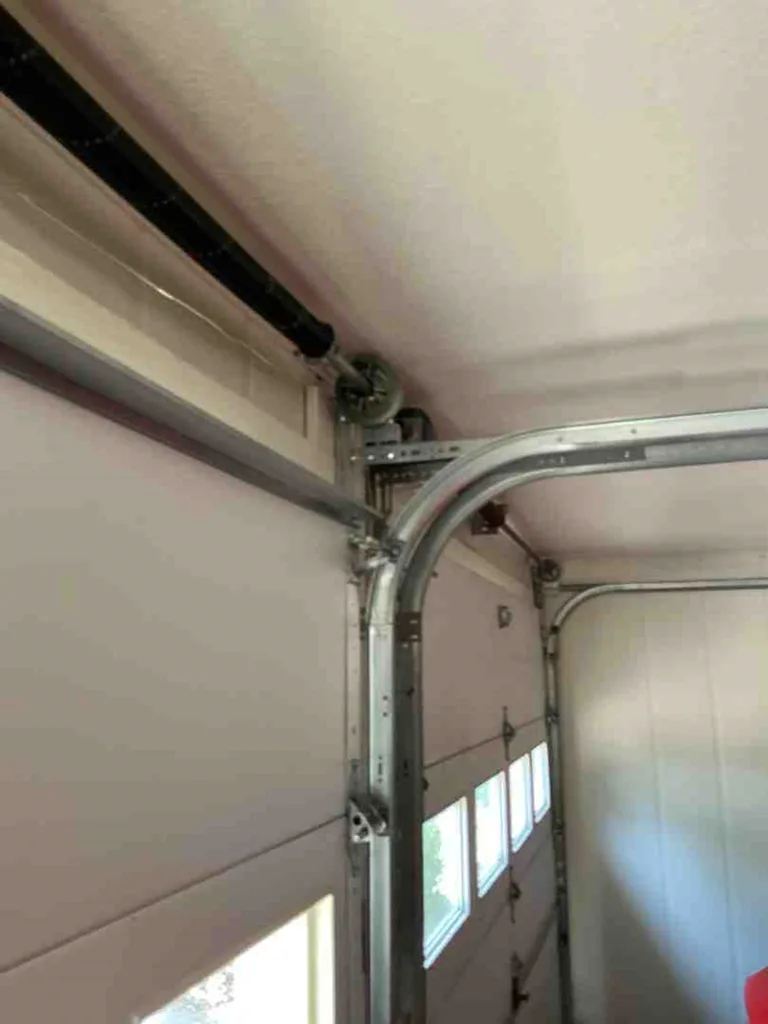
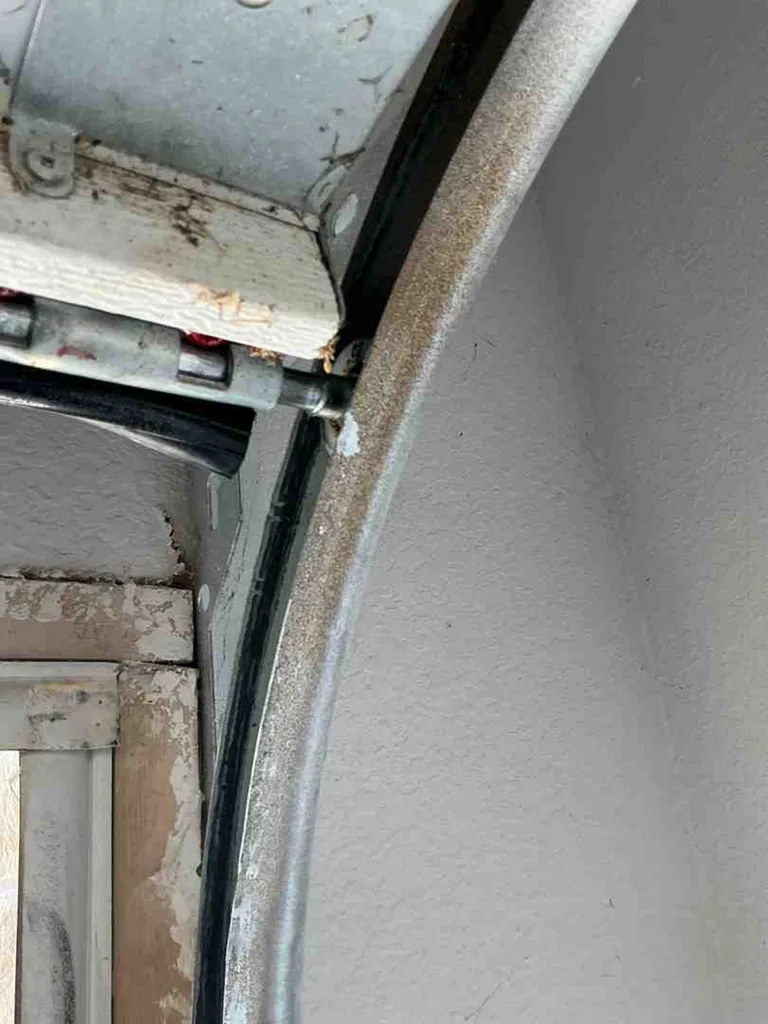
A thorough visual inspection is your first line of defense against garage door malfunctions. Dedicate a few minutes each month to carefully examine all visible components. Start by looking for any signs of cable fraying on the lift cables that run along the side of the door. These cables are under significant tension, and even minor fraying can indicate an imminent failure. Next, check the roller alignment to ensure all rollers are sitting securely within their tracks and not showing excessive wobble or wear. Inspect the hinge cracks; hinges can develop stress fractures over time, especially if the door is unbalanced or frequently jarred.
While the door is operating, pay close attention to operational sounds. Listen for any grinding, squeaking, scraping, or binding noises that weren’t there before. These sounds are often early indicators of issues such as dry components, misaligned tracks, or worn rollers. Finally, scan for general metal fatigue or bent components, particularly on the tracks, brackets, and panels. Early detection of these issues can prevent significant damage and extend the life of your garage door system.
Hardware Tightening and Track Cleaning
Over time, the constant vibration from the garage door’s operation can cause various nuts and bolts to loosen. This phenomenon, known as vibration loosening, can lead to components becoming misaligned or even falling off. As part of your monthly routine, we recommend using your socket set to check and tighten all visible hardware, including the bracket bolts that secure the tracks to the garage wall, and the bolts on the hinges. Be careful not to overtighten, as this can strip threads or warp components.
Equally important is maintaining clean tracks. Dirt, dust, and debris can accumulate in the vertical tracks and curved sections, impeding the smooth movement of the rollers. This can cause the door to bind, creating undue strain on the opener and other parts. Use a clean rag to wipe down the inside of both vertical and horizontal tracks, removing any accumulated residue removal. It’s crucial to remember that garage door tracks should not be lubricated. Lubricants attract more dirt and create a sticky buildup, exacerbating the problem. If you notice the tracks appear bent or out of line, a quick check with a level can confirm track alignment issues. Minor adjustments might be possible, but significant misalignment often requires professional attention to prevent further damage.
Safety Feature Testing and Door Balance Procedures
Safety is paramount when it comes to garage door operation. Modern garage door openers, especially those manufactured after 1993, are equipped with crucial safety features designed to prevent injury and damage. Regularly testing these features is not just a recommendation; it’s a critical part of responsible homeownership. We will focus on the auto-reverse mechanism and photo-eye sensors, which are designed to detect obstructions and prevent the door from closing on people or objects. Additionally, understanding how to perform a door balance test is vital, as it indicates the health of your door’s spring system and prevents unnecessary strain on your opener.
Mechanical Auto-Reverse and Photo-Eye Tests
The mechanical auto-reverse test is a simple yet vital safety check. To perform it, place a 2×4 piece of wood or a similar object flat on the garage floor directly in the path of the closing door. Activate the door to close. If the door contacts the two-by-four test object, it should immediately reverse direction and open fully. This mechanism is designed to prevent the door from crushing anything in its path. If your door fails this test, it indicates a serious safety hazard, and you should stop using the opener until the issue is resolved by a qualified technician.
Next, test your photo-eye sensors. These small units, typically located about 6 inches off the ground on either side of the door opening, emit an invisible infrared beams that, when broken, signal the door to reverse. To test them, start the door closing, then wave a broom handle or your foot through the beam. The door should immediately stop its descent and reverse. If it continues to close, the sensors are not functioning correctly. Often, issues with photo-eyes stem from optical alignment problems, where the two sensors are not perfectly facing each other, or from dirty lenses. Use a soft, clean cloth to perform sensor cleaning and ensure they are free of dust or cobwebs. If cleaning and alignment don’t resolve the issue, professional service is needed. These safety regulations, mandated by federal law (UL 325 standard), are critical for preventing serious injuries.
Expert Garage Door Maintenance for Balance Testing
A properly balanced garage door is crucial for its longevity and safe operation. The balance test assesses the tension of your garage door springs, which are responsible for counteracting the door’s weight. To perform this test, first ensure the door is fully closed. Then, pull the manual release cord (usually a red handle hanging from the opener trolley) to disconnect the opener from the door. Now, you should be able to lift the door manually. Raise the door to about waist height (approximately 3 to 4 feet) and release it.
If the door remains stationary at that halfway lift point, it indicates good balance equilibrium and that your springs are correctly tensioned. If the door immediately slides back down, the springs are too weak or worn out. If it springs upward, the springs are too strong or over-tensioned. Both scenarios indicate an imbalance that puts undue motor strain on your garage door opener and can lead to premature wear or failure of the spring system itself. An unbalanced door is also heavier and more dangerous to operate manually. Addressing spring issues requires specialized tools and expertise due to the high tension involved, making it a task best left to professionals. For more detailed guidance on assessing your garage door’s health and when to seek assistance, exploring comprehensive resources on expert garage door maintenance can provide valuable insights.
Component Lubrication and Seasonal Care Routine
Lubrication is a cornerstone of effective garage door maintenance, ensuring smooth operation and extending the lifespan of moving parts. However, not all lubricants are created equal, and knowing where and when to apply them is key. Beyond regular lubrication, considering the impact of seasonal prep on your garage door is vital. Extreme temperatures, such as intense summer heat and harsh winter contraction, can significantly affect the performance and durability of your door’s components and weather seals. Adjusting your maintenance routine to account for these environmental factors can prevent common seasonal failures.
Lubricant Selection and Moving Parts Application
Choosing the right lubricant is critical for garage door longevity. We strongly recommend using a silicone spray or white lithium grease specifically designed for garage doors. Unlike general-purpose oils, these lubricants won’t attract dust and grime, which can lead to sticky buildup and increased friction.
When applying, focus on the moving metal parts. Spray or apply grease to the hinge pivots at the center of each hinge. For the rollers, target the roller bearings (if they have them) and the stems that connect them to the hinges, but never lubricate the rubber or nylon part of the roller itself, as this can degrade the material. If your door has a torsion spring (a large spring mounted horizontally above the door), a light spray of silicone on the torsion coils can help reduce friction and noise. For openers with a chain or screw drive, a small amount of white lithium grease can be applied to the chain or screw, following the manufacturer’s instructions. Crucially, practice solvent avoidance: never use products like WD-40 on garage door components. WD-40 is a solvent, not a long-term lubricant, and it can strip away existing grease and attract dirt, leading to more problems down the line.
Weatherproofing and Temperature Extreme Adjustments
Effective weatherproofing is essential for maintaining your garage’s energy efficiency and protecting its interior from the elements. Regularly inspect the bottom seal along the garage door’s lower edge for cracks, tears, or brittleness. This seal is crucial for keeping out water, drafts, and pests. Similarly, check the perimeter stripping—the weather seals along the sides and top of the door frame. Over time, exposure to UV light and temperature fluctuations can cause rubber brittleness and cracking, reducing their effectiveness. Replacing worn seals is a straightforward DIY task and can significantly improve your garage’s insulation.
Temperature extremes also demand specific attention. In summer, intense heat and UV rays can degrade weather seals and cause lubricants to thin out, reducing their effectiveness. In winter, cold temperatures can cause materials to contract and lubricants to thicken, leading to sluggish operation. Thermal expansion and contraction can also put stress on components. To combat this, consider a fresh lubrication in early fall to prepare for winter, and another in spring after the cold subsides. For areas prone to freezing, ensure the bottom seal is clean and free of ice buildup to prevent it from freezing to the concrete, which can damage the seal or the opener.
Here’s a comparison of common garage door roller types and their typical lifespans:
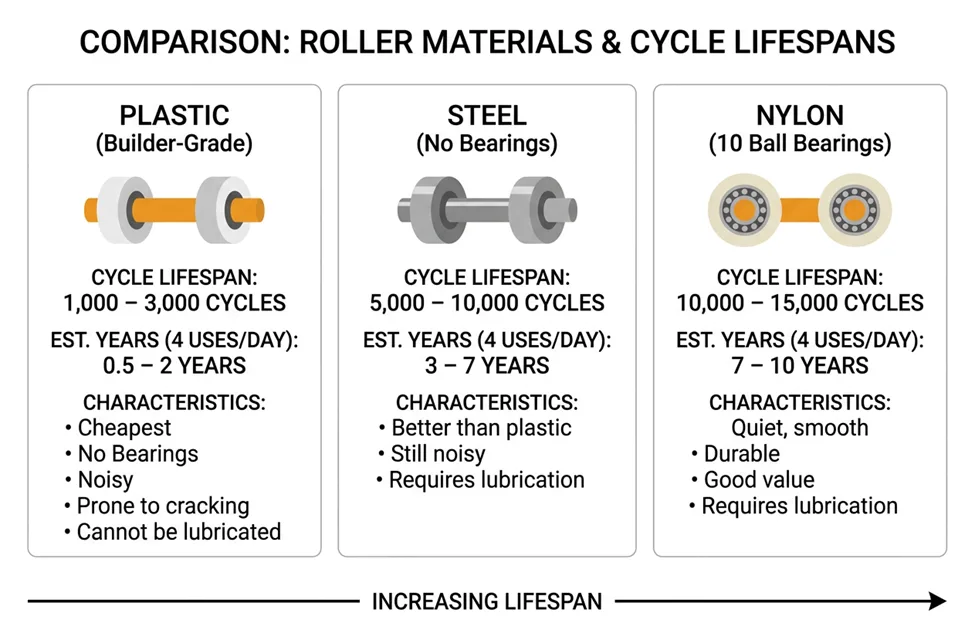
Roller Material Typical Cycle Lifespan Estimated Years (4 uses/day) Characteristics Plastic (Builder-Grade) 1,000 – 3,000 0.5 – 2 Cheapest, no bearings, noisy, prone to cracking, cannot be lubricated. Steel (No Bearings) 5,000 – 10,000 3 – 7 Better than plastic, but still noisy, requires lubrication. Nylon (10 Ball Bearings) 10,000 – 15,000 7 – 10 Quiet, smooth, durable, good value, requires lubrication. Nylon (13 Sealed Bearings) 20,000 – 50,000+ 15+ Premium, quietest, longest lasting, sealed bearings require less lubrication. Understanding these lifespans can help you anticipate when components might need replacement and plan your maintenance accordingly.
DIY Care Boundaries vs. Expert Garage Door Maintenance
While many maintenance tasks are well within the capabilities of a diligent homeowner, it’s crucial to recognize the limits of DIY work. Garage doors, particularly their spring systems, operate under extreme tension and can pose significant safety risks if mishandled. Knowing when to call a professional isn’t just about convenience; it’s about preventing serious injury and ensuring the long-term integrity of your garage door system. We’ll differentiate between tasks that are safe for homeowners and those that unequivocally require the expertise of a trained technician.
Safe Homeowner Fixes vs. High-Tension Hazards
Many common garage door issues can be safely addressed by a homeowner. Tasks like roller replacement (especially upgrading from plastic to nylon rollers), seal renewal for bottom and perimeter weatherstripping, hardware tightening, and routine lubrication are generally safe and encouraged. These tasks typically involve readily accessible parts and do not require specialized tools or interaction with high-tension components.
However, certain repairs fall squarely into the category of high-tension hazards. Any work involving the garage door’s counterbalance system, specifically the torsion springs (mounted above the door) or extension springs (running along the horizontal tracks), should always be performed by a professional. These springs are under immense spring tension—enough to lift a door weighing hundreds of pounds—and can cause severe injury or even death if they snap or are improperly handled. Similarly, cable replacement, track remounting if the door has come off its tracks, or significant opener failure (beyond a simple battery change or sensor cleaning) are complex tasks that require specialized knowledge, tools, and safety protocols. Attempting these repairs without proper training and equipment is a significant risk. Prioritizing injury prevention means respecting these professional boundaries.
Component Lifespans and Expert Garage Door Maintenance Timing
Understanding the typical component lifespans of your garage door system can help you anticipate when professional intervention might be necessary. For instance, standard 10,000-cycle torsion springs typically reach their end-of-life in roughly 7 years, assuming an average of four uses per day. While some high-cycle springs can last longer, a spring older than this benchmark should be professionally inspected. Most residential garage door openers, with basic maintenance, have an opener longevity of 10 to 15 years. Beyond this, wear and tear on internal gears and electronics can lead to unreliable operation and potential safety issues.
As discussed, upgrading to nylon rollers with ball bearings significantly extends their lifespan compared to basic plastic ones. While you can replace rollers yourself, a professional can also assess the overall condition of your door. Regular, scheduled tune-ups by a professional are invaluable for catching issues before they become critical. During a professional inspection, technicians can identify subtle signs of wear, check the balance with precision, and ensure all safety features are functioning optimally. If you notice any persistent warning signs—such as unusual noises, jerky operation, or the door failing safety tests repeatedly—it’s time to schedule a professional visit rather than attempting a complex DIY fix.
Frequently Asked Questions About Garage Door Upkeep
How often should garage door parts be lubricated?
We recommend a semi-annual schedule for lubricating your garage door’s moving parts, ideally once in the spring and again in the fall. This seasonal timing ensures the door is prepared for both the heat of summer and the cold of winter. For homes with very high-use frequency (e.g., more than 6-8 cycles per day) or in extremely harsh climates, you might consider lubricating every three to four months. Focus on the hinge lubrication, roller bearings, and torsion spring coils. Regular lubrication helps reduce friction, minimizes wear and tear, and ensures quiet, smooth operation.
Why should standard WD-40 never be used on door tracks?
Standard WD-40 is primarily a solvent and a water dispersant, not a long-term lubricant. While it might temporarily quiet a squeak, its properties are detrimental to garage door tracks and components in the long run. It can strip away existing, proper lubricants, and its oily residue actively encourages dust accumulation, creating a sticky, abrasive paste that increases friction rather than reducing it. This sticky residue can cause rollers to bind and tracks to clog, leading to more significant problems. Tracks should be kept clean and dry; if lubrication is needed for other parts, always use a specialized silicone or white lithium grease product.
What are the immediate signs that a garage door spring is failing?
Several immediate signs indicate that a garage door spring is failing or has already broken. The most obvious is if the door feels extremely heavy door when you try to lift it manually, even after disconnecting the opener. You might also notice a visible coil separation in a torsion spring (a gap where the spring should be continuous). Other signs include jerky or uneven movement during operation, the door stopping partway up or down, or the opener motor straining excessively. If a spring breaks while the door is closed, you might hear a very loud bang, often described as a gunshot-like sound. In any of these scenarios, it’s crucial to stop using the door immediately and contact a professional for spring replacement.
Conclusion
Proactive garage door maintenance is an investment in your home’s safety, efficiency, and longevity. By following these DIY garage door maintenance tips between professional visits, you can significantly extend your system lifespan, ensure family safety, and maintain optimal operating efficiency. A well-maintained garage door not only functions smoothly but also prevents unexpected breakdowns and costly emergency repairs. While many tasks are within your reach, always respect the boundaries of DIY work, especially concerning high-tension components. Regular visual checks, safety tests, and proper lubrication are key. For complex issues or annual check-ups, don’t hesitate to schedule professional tune-ups to keep your garage door in peak condition for years to come.